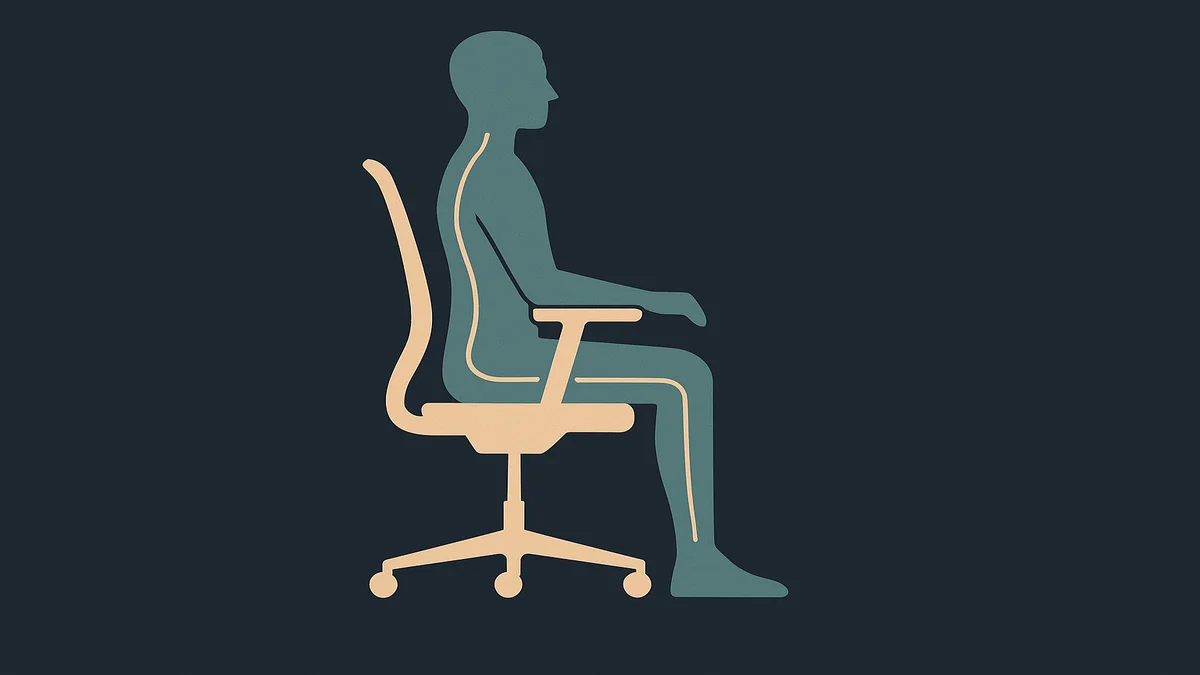
Office chair ergonomics is adjusting the chair to your body: seat height so your feet rest flat, seat depth with a few inches clear behind your knees, lumbar support in your lower back, a slight recline, and relaxed shoulders. Set these five adjustments and most remote-work aches stop showing up.
I’ve spent more than a decade fully remote, and I’ve sat in dining chairs, recliners, and a rotating cast of task chairs. The pattern I keep seeing: people blame their chair when the real problem is that the chair was never adjusted to their body in the first place. A mediocre chair set up correctly usually beats an expensive chair set up wrong. This page walks through the adjustments that matter, in the order I’d fix them, so you can decide what your setup actually needs before you spend anything.
Key subtopics and decisions
Before tweaking anything, it helps to know what you’re actually deciding. Office chair ergonomics breaks down into a handful of subtopics, each with its own decision.
Key use cases
Different remote-work situations pull on different parts of the chair setup:
Full-day desk work. Long sessions make every small misfit add up. Seat height, seat depth, and lumbar support do the heavy lifting here.
Mixed work (couch, kitchen table, dedicated desk). If you rotate surfaces, portability and consistent posture habits matter more than any single chair’s features.
Video calls and meetings. Camera height and how far back you sit interact with chair height and recline; a chair that’s right for typing can put you too low on camera.
Recovery or pain management. If you’re working through lower-back discomfort, adjustability — especially lumbar height and recline tension — becomes the deciding feature, not cushioning.
Priority guides
If you’re going to fix things in a sensible order, this is the order I’d use:
Seat height. The general ergonomic benchmark (used in OSHA’s computer-workstation guidance) is a seat that adjusts roughly between 16 and 21 inches, sized so your feet rest flat on the floor and your knees are about level with your hips. If your feet dangle or your knees ride up, height is your first fix.
Seat depth. Sit all the way back. You want roughly 2–3 inches (or about two or three finger-widths) of clearance between the seat edge and the backs of your knees. Too deep and the seat edge presses behind your knees; too shallow and your thighs lose support. Chairs with a seat-depth slider solve this; a cushion behind your lower back solves the “too far forward” version.
Lumbar support. The backrest’s lower section should meet the natural inward curve of your lower back, and ideally be adjustable in height. A fixed lumbar pad is fine if it lands in the right spot on your body — that’s Cornell’s ergonomics guidance in essence: fit matters more than the mechanism.
Recline. Sitting bolt upright at 90° all day isn’t the win people assume. Spine specialists commonly recommend reclining back to roughly 100–110 degrees, which reduces load on the lumbar discs compared with a rigid 90° posture. Cornell’s chair guidance also notes that locking a backrest in one position generally isn’t beneficial — movement is part of the point.
Armrests and desk height. Armrests should let your shoulders relax and your elbows sit near 90 degrees while you type. If they force your shoulders up, lower them — or move them out of the way entirely, because for keyboard work some people are better off with arms resting at the desk.
Money/decision pages
If the topic is new to you, two related decisions tend to carry the most weight:
Whether the rest of your workspace is part of the problem. A correctly set chair aimed at a badly placed monitor still produces neck strain. If your whole setup needs a pass rather than just the chair, start with the broader home office overview and work outward.
What to fix with a $0 adjustment versus what to buy. Everything in the priority list above is free to adjust on any chair with the usual levers. Buying enters the picture mainly when the chair physically can’t fit you — no height range, no depth adjustment, a backrest that misses your lumbar curve entirely.
One honest note on chair shopping: this site doesn’t currently have a dedicated chair-buying hub live, so I’ll say plainly what I’d check rather than point you at a category page. Look for pneumatic (one-lever) height adjustment spanning a range that fits your leg length, a seat-depth slider or waterfall-front seat, adjustable lumbar height, adjustable armrests, and a five-point base with casters suited to your floor. Those criteria track the Cornell ergonomic chair checklist and OSHA’s workstation guidance, and they’re the same ones I’d verify in person with a sit test of an hour or more, not two minutes.
Recommended tools, products or methods
Most of ergonomics is measurement, not merchandise. Here’s what I’d actually keep on hand, by category.
Category choices
A tape measure or a phone’s measure app. The fastest way to diagnose fit: measure your seat height from floor to seat pan, then compare it to your lower-leg length (floor to the bend of your knee). If the seat is more than about an inch above that, it’s too high — the single most common misadjustment I see in remote setups.
A seat-depth slider or a firm lumbar cushion. If the chair can’t shorten its seat, a slim cushion placed against the backrest restores the lumbar contact you lose when you scoot forward. A rolled towel works well enough to test the idea before buying anything.
A footrest — only if you need one. Cornell’s guidance is blunt that most people shouldn’t need a footrest once the seat height is right. It earns its place only when a shared or fixed-height chair leaves your feet unsupported.
A monitor arm or riser. Not a chair product, but chair and monitor height are one system. If raising your chair to fix your legs pushes your eyes below the screen’s top third, the monitor moves next, not your posture.
A pointer, not a second class of hardware: your mouse. Upper-limb strain is usually a chain — chair height sets elbow height, which sets wrist angle, which makes or breaks how neutral your wrist is. When you’ve got the chair dialed in, the pointing device is the next link to review; the site’s guide to the best mouse for work covers that piece separately.
Reviews/comparisons
Chairs: as noted above, there’s no live chair-review section on this site yet. Until there is, compare candidates against the five-point checklist in the priority guides above rather than against marketing features like “gaming” styling or mesh-versus-foam debates, which matter far less than whether the seat depth and lumbar height fit your body.
Desk setups: for the wider workspace around the chair, the home office hub collects the related setup pages in one place.
If you only do one thing this week: set your seat height so both feet rest flat and your knees are level with your hips, then sit fully back and note where the backrest meets your lower back. That five-minute check diagnoses most of what a new chair purchase would have — and costs nothing.
How to choose the right approach
With the subtopics on the table, here’s the decision logic I use, refined over years of rearranging my own setup.
Start from symptoms, not from gear. Lower-back ache points at seat depth, lumbar height, and recline. Neck and shoulder tension points at monitor height and armrest height. Tingling or soreness in the wrists points at the chair-to-desk-to-mouse chain. Matching the fix to the symptom keeps you from buying a $900 chair to solve a problem a riser and a tape measure would have solved.
Adjust before you upgrade. Every chair with standard levers can hit the benchmarks above. If you’ve never run the full adjustment pass — height, depth, lumbar, recline tension, armrests — you don’t yet know what your chair can’t do.
Upgrade only on structural misfit. Buy when the chair physically can’t reach your body: the height range misses your legs, the seat is far too deep with no slider, the backrest tops out below your mid-back, or the padding has collapsed after years of 60-plus-hour weeks. That’s a buying decision grounded in evidence you gathered yourself.
Anchor the numbers to your body, not to averages. The 16–21 inch seat-height range from OSHA’s guidance is a range of adjustment, not a target. The actual test is binary and personal: feet flat, knees level, back in contact with the lumbar curve, elbows relaxed at typing height.
Re-check after any desk or monitor change. Ergonomics is a system. Raise the desk and the chair, armrests, and monitor all inherit the change. I re-run the five-minute check after every workspace move — it has caught more problems than any purchase ever fixed.
Step-by-step guides
Here’s the full adjustment sequence, top to bottom. Ten minutes, done once, holds until your desk or chair changes.
Step 1 — Set seat height
Stand facing the chair and raise or lower the seat so it lands at the height of the space just below your kneecap. Sit down. Your feet should rest flat on the floor with knees roughly level with your hips. If they dangle, lower it; if your knees slope upward, raise it. This is the adjustment everything else inherits, so it goes first.
Step 2 — Check seat depth
Scoot your hips fully back into the seat. Reach down: you should fit roughly two or three fingers between the seat’s front edge and the back of your knee. If the seat is too deep and there’s no slider, add a firm cushion behind your lower back to move your body forward of the edge — that’s the practical fix Cornell’s own workstation guidance suggests.
Step 3 — Position lumbar support
Adjust the backrest’s lumbar pad (or place your cushion) so it presses gently into the natural inward curve of your lower back, not your mid-back and not your belt line. When it’s right, sitting fully back feels supported without pressure points, and you stop unconsciously perching forward.
Step 4 — Set recline and tension
Lean back to about 100–110 degrees and set the tilt tension so the chair supports you there with light effort. Unlock the tilt if you can — static postures are their own problem, and Cornell’s chair guidance specifically cautions against locking a backrest in a single position. Shift positions during the day; the recline is for working, not just for breaks.
Step 5 — Set armrests and desk interface
With hands on the keyboard, your elbows should sit near 90 degrees and your shoulders should hang relaxed. Lower or widen the armrests until they stop interfering; for typing, many people do better with armrests down and out of the way, arms lightly resting at the desk edge.
Step 6 — Align the rest of the workspace
Now that the chair is set, raise or lower your monitor so the top of the screen sits at or slightly below eye level, and check that your wrists stay neutral over the keyboard and pointer. If the chair height that suits your legs leaves the screen too low, fix the screen — don’t re-break the chair.
Step 7 — Test under load
Work in the setup for at least 60 minutes before declaring victory. Cornell’s seating checklist makes this exact point: a seat that feels fine for two minutes can fatigue over 60 to 120, and low-density foam that collapses under sustained sitting is a fit failure you can only find by sitting.
Related comparisons and reviews
Once the fundamentals are handled, these adjacent comparisons sharpen the picture. Coverage here is honest about what exists and what doesn’t yet.
Chair reviews and comparisons: not currently available as a dedicated section on this site. The five-point buying checklist in the sections above is the comparison framework I’d apply to any chair on a showroom floor or a product page.
Pointing devices: the mouse completes the arm chain the chair starts. The site’s roundup of the best mouse for work reviews the options in one place.
The full workspace: for how the chair fits into desk height, monitor placement, lighting, and layout, the home office hub ties the cluster together.
Seat-height deep dives: the specific question of
seat height and how to set it matters enough to deserve its own guide; that page isn’t live on this site yet, so the short version is what’s in Step 1 above — floor-to-kneecap stand test, then the flat-feet-and-level-knees seated test.
Frequently asked questions
How do I sit correctly in an office chair?
Sit fully back so your lower back contacts the lumbar support, with feet flat on the floor and knees about level with your hips. Leave two to three finger-widths between the seat edge and the backs of your knees, relax your shoulders, and let your elbows rest near 90 degrees while typing. Recline slightly to about 100–110 degrees and change position regularly rather than holding one rigid posture.
How long should I sit before I need to move or take a break?
There’s no single validated number, but the direction of the evidence and the ergonomic guidance is consistent: break up static sitting rather than accumulating it. I use a practical rule — stand or walk for a couple of minutes roughly every half hour, and adjust my recline a few times an hour. Cornell’s chair guidance makes the underlying point well: movement of the back while seated helps maintain a healthy spine, which is exactly why locking a backrest in one position isn’t recommended.
Do I need an expensive ergonomic chair, or can I fix my current one?
Try the full adjustment sequence above first — height, depth, lumbar, recline, armrests. If your chair hits the benchmarks after adjustment, nothing needs to be bought. A purchase is justified when the chair structurally can’t fit you: the height range misses your legs, the seat is too deep with no slider, or the backrest can’t reach your lumbar curve even with a cushion. Set up well, a modest chair usually outperforms a premium one set up badly.